

Manually Add Shared Mailbox

Last updated: Sep 20, 2024
225
views

Manually Add Shared Mailbox
After your admin has added you as a member of a shared mailbox, close and then restart Outlook. The shared mailbox should automatically appear in your Folder pane in Outlook. If it does not appear, please follow the instructions below depending on which version of Outlook you’re using.
New Outlook
- In the Folder pane, right-click your account name, and select Add shared folder or mailbox.
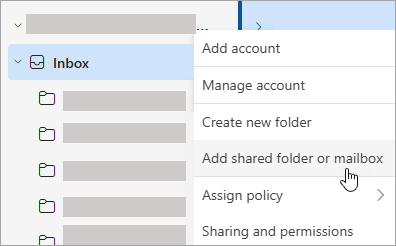
- In the Add shared folder or mailbox window, type the name of the mailbox you want to access, for example, [email protected].
Classic Outlook
- Select the File tab on the ribbon, then select Account Settings > Account Settings.
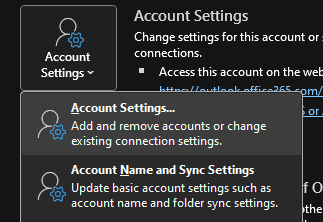
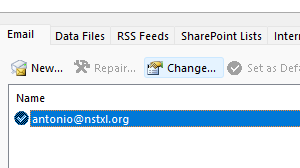
- Select the Email tab
- Make sure the correct account is highlighted, then choose Change.
- Choose More Settings > Advanced > Add.
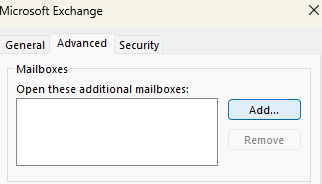
- Type the shared email address, such as [email protected]
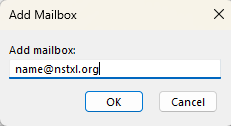
- Choose OK > OK.
- Choose Next > Finish > Close
Outlook on the Web
- For Exchange Online mailboxes, right-click Folders in the left navigation pane, and then choose Add shared folder or mailbox. For Exchange on-premises mailboxes, right-click the name of your primary mailbox (such as Molly Dempsey) in the left navigation pane, and then choose Add shared folder or mailbox.
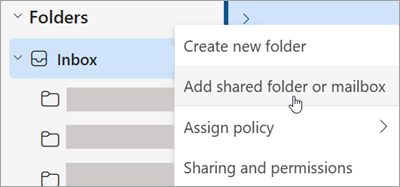
- In the Add shared folder dialog box, type the name of the shared mailbox you are a member of, such as [email protected].

